Add Active Directory to Sophos Firewall (SFOS)
This article shows how to add an Active Directory server to Sophos Firewall. This guide assumes a Sophos Firewall with the SFOS operating system.
Von Sophos gibt es mittlerweile auch ein Video, welches die Sache gut veranschaulicht.
Preparation
Log in to your Sophos Firewall (SFOS) as an administrator and go to Authentifizierung > Server from the menu. Then click the blue button Hinzufügen to add a new server. On this page we will now go through the settings in 12 steps and make the necessary entries.
Also note the following graphic with the steps drawn in so that you can follow the instructions more easily:
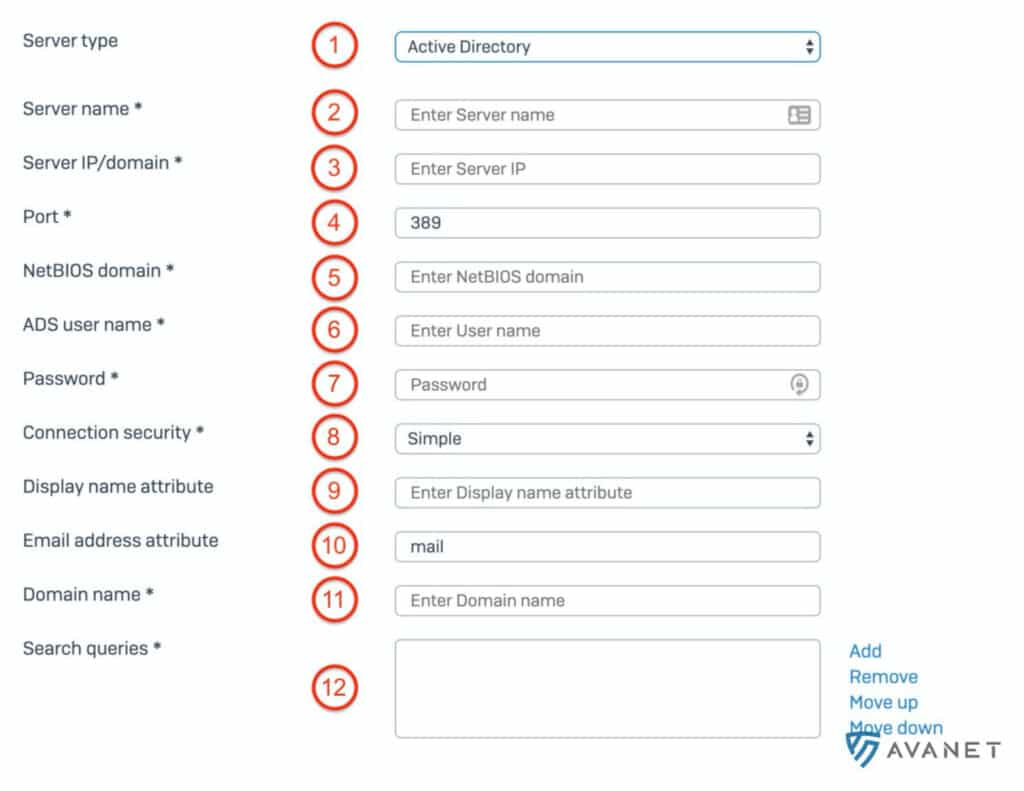
1. server type
There are several authentication servers that you can add:
- LDAP Server
- Active Directory
- Radius Server
- TACACS+ Server
- eDirectory
In this guide we explain the most used method: Active Directory.
2. server name
You are completely free to choose the server name. We often use the hostname of the server here.
3. server IP/domain
Enter the IP address of the domain controller here.
4. port
The port depends on the connection security, which you have to define further down at point 8. For example, if you select SSL/TLS there, the port automatically changes to 636. We have tested the following combinations and they would work:
- Port: 389 (LDAP) → Verbindungssicherheit: Simple (Wird unter Punkt 8 definiert)
- Port: 636 (LDAPS) → Verbindungssicherheit: SSL / TSL (Wird unter Punkt 8 definiert)
5. NetBIOS domain
To find out the NetBIOS domain, the Active Directory Users and Computers program can help you. If you type “Active” in the search window on the AD via the Windows Start menu, the entry should already appear.
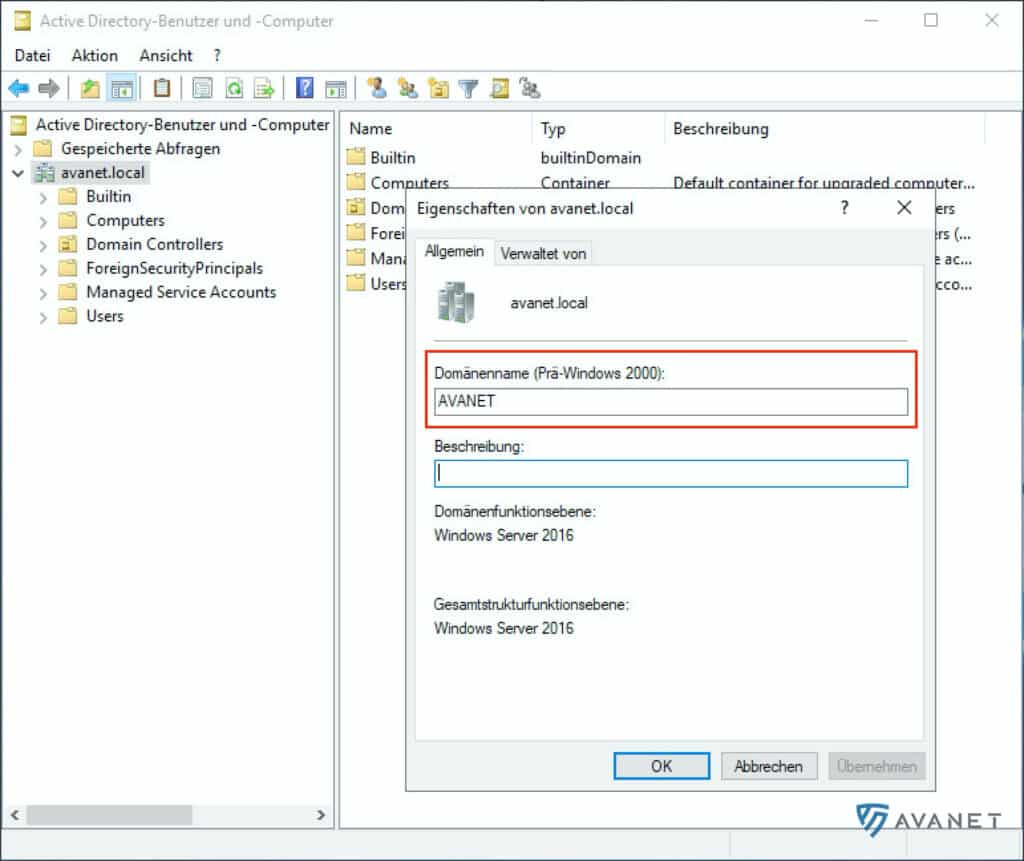
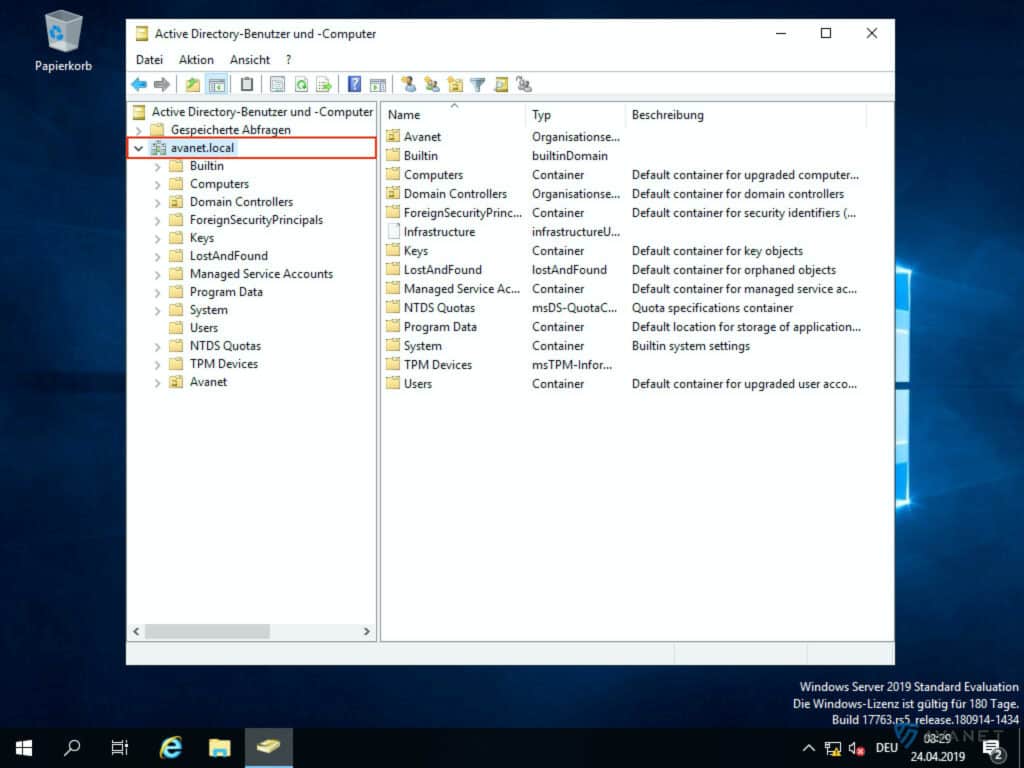
Now right-click on the domain name and select Eigenschaften. In my example, the domain name would be avanet.local. In the screenshot above you can see the domain name framed in red. So the NetBIOS domain in our case would be AVANET.
6. ADS username
Specify here a user who has the right to read the AD structure. In productive environments, we recommend using a service user here rather than the domain administrator. For this documentation, we have only used the administrator for testing purposes, as he certainly has enough permissions.
7. password
Add the password for the ADS user specified in point 6.
8. connection security
As described in point 4, the connection security is related to the port. By default, the Simple option works here in most cases. If your domain controller is set differently, you surely know what to do here yourself. The following options are possible:
- Simple
- SSL/TLS
- STARTTLS
9. show name attribute
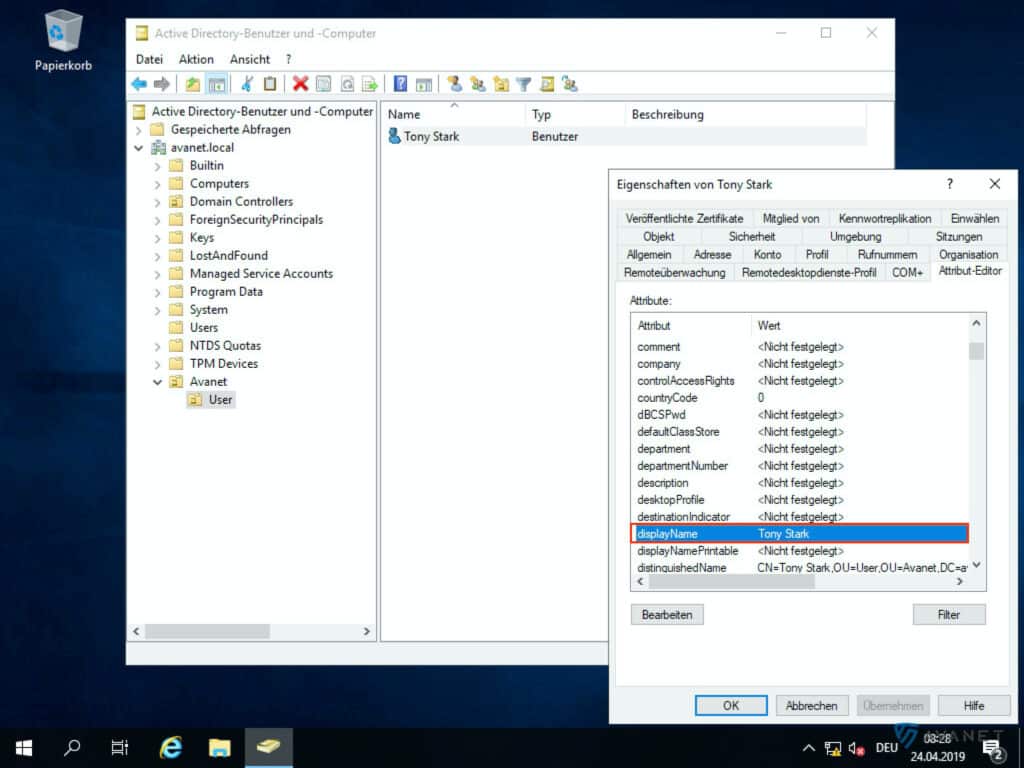
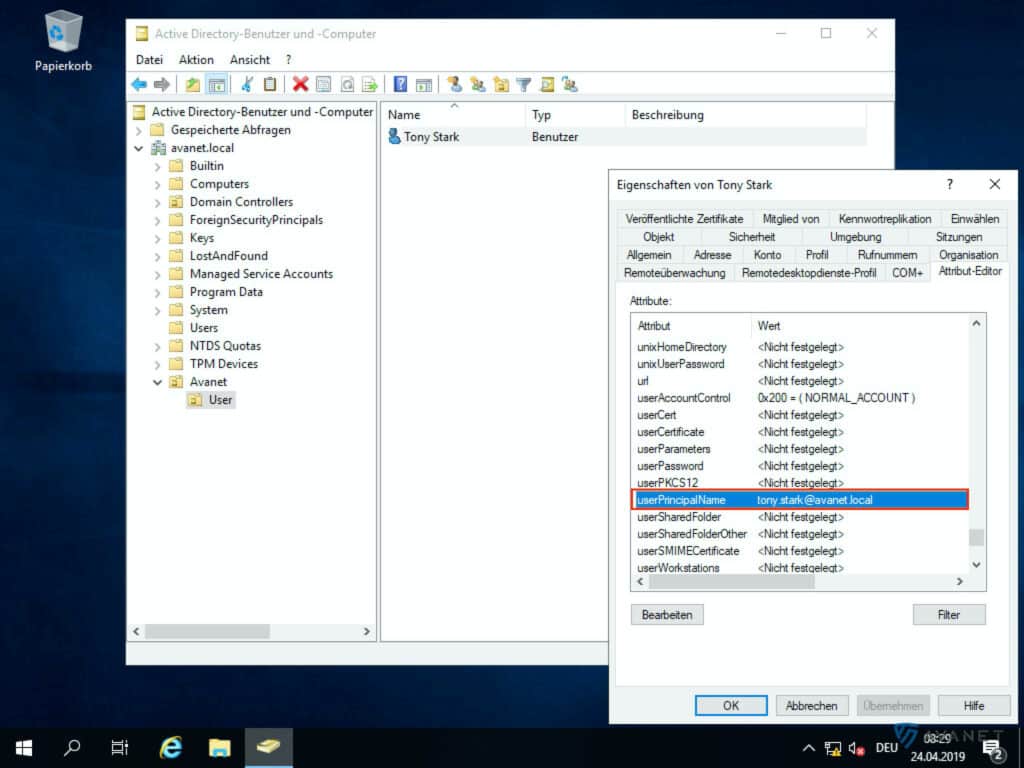
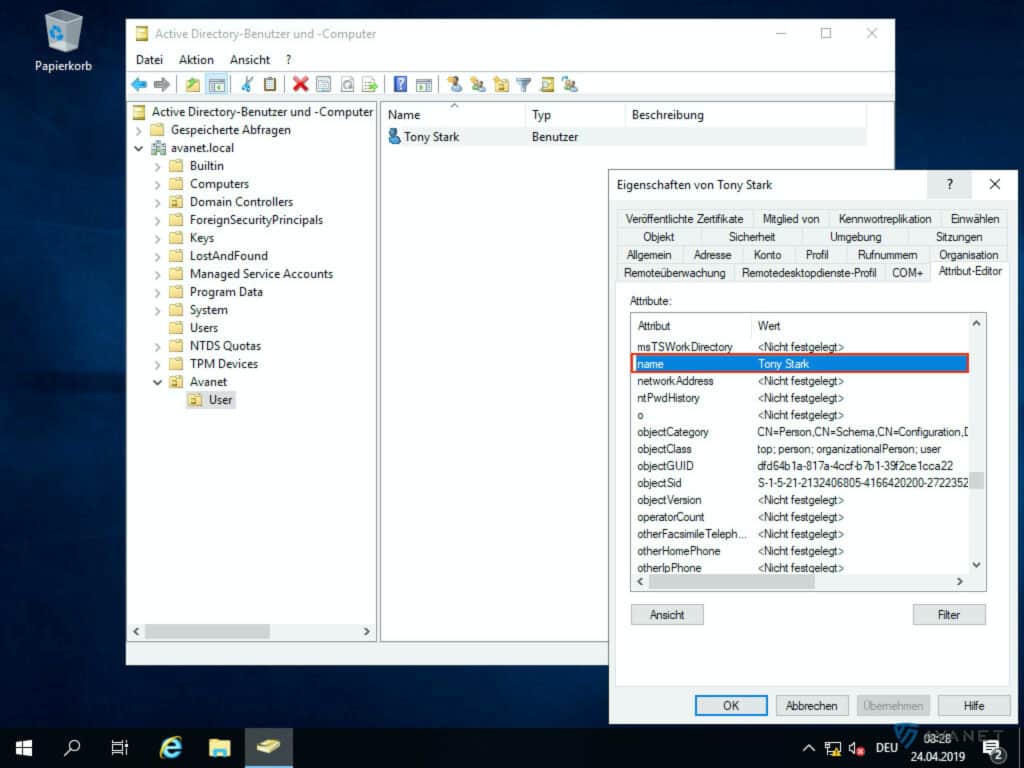
Under this item you can determine how the user names should be displayed on your XG Firewall. You can control this via the so-called “Display-Name attribute”. The following attributes are available to you:
- displayName
- sAMAccountName
- userPrincipalName
- name
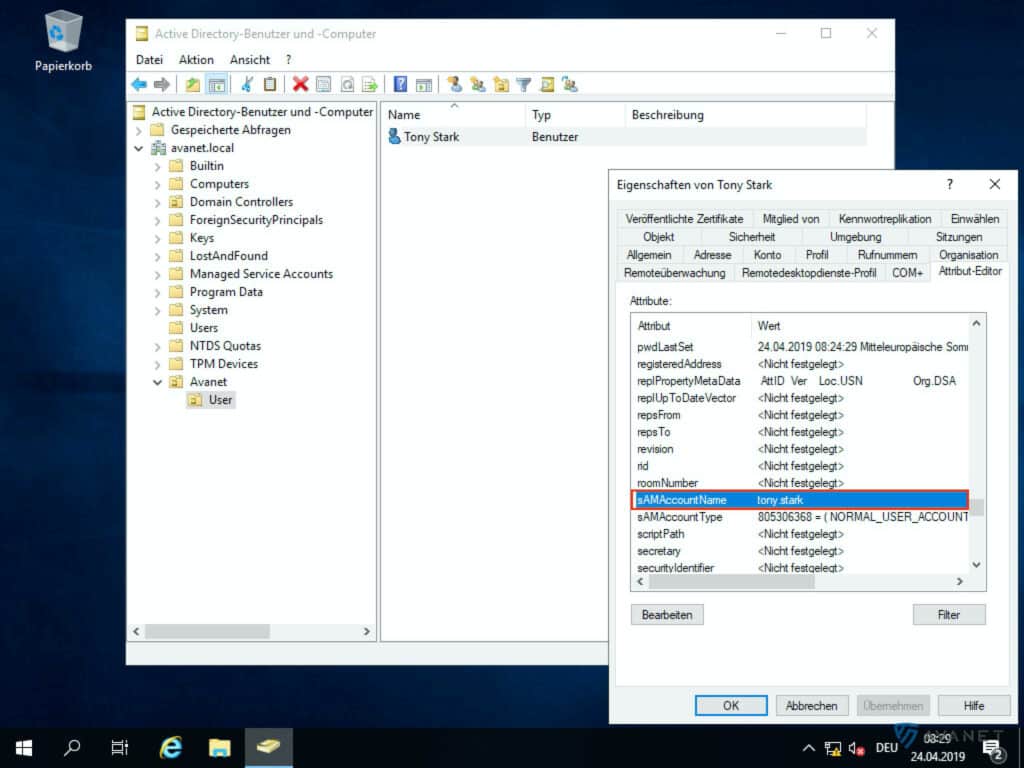
To find out what formatting is behind these terms, you can again use the Active Directory Users and Computers program to help you. In order to see all the attributes, you must have the Advanced Features view enabled.
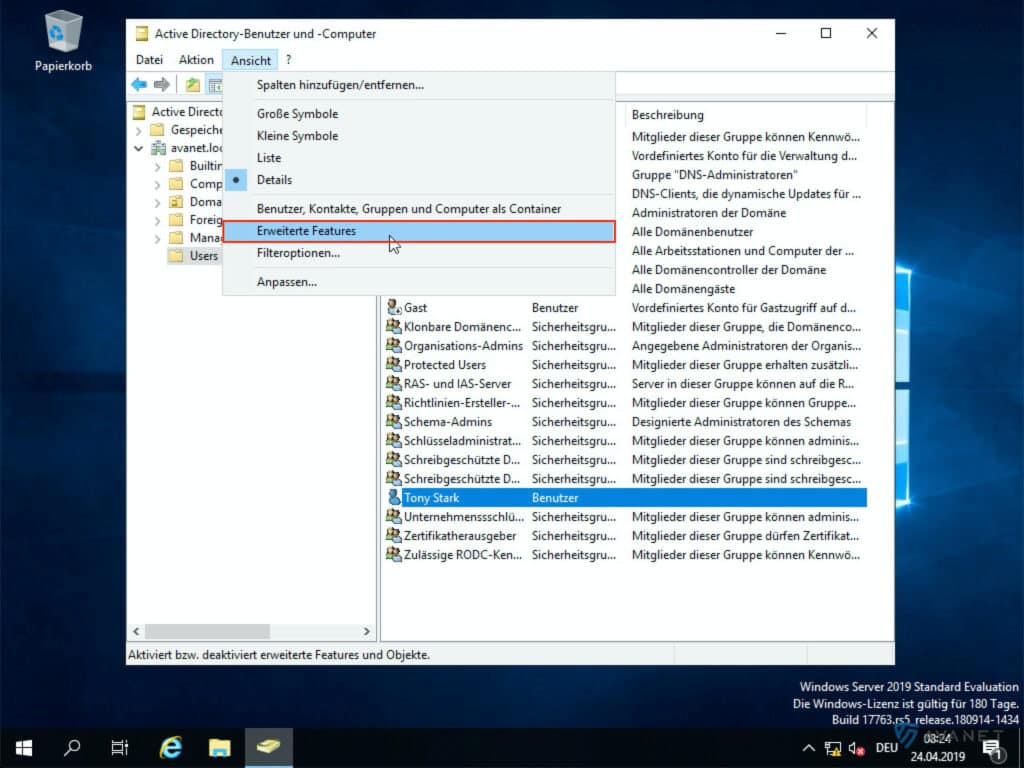
In the image gallery below you can take a closer look at the attributes listed above using our example.
10. email address attribute
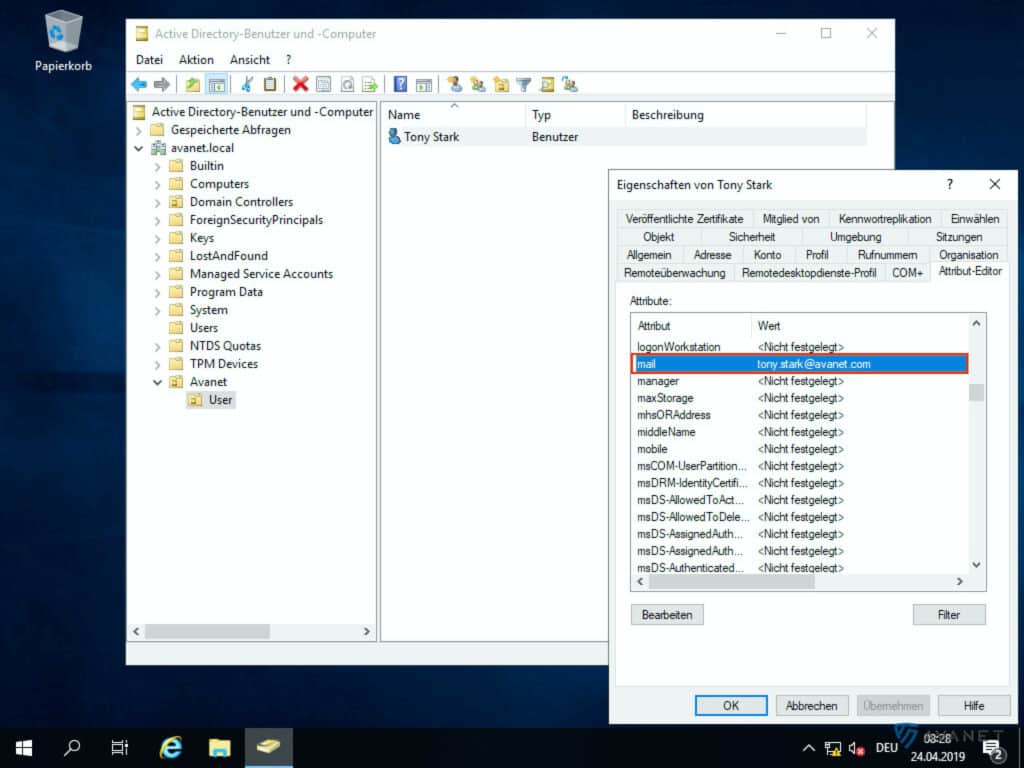
By default and in most cases, the attribute mail is used here. This field is optional and only relevant if your XG Firewall is also used as email server via “Mail Transfer Agent” (MTA). For this, the XG should already know the email addresses of the users, which is very helpful for the “Email Quarantine Report”, for example.
On the AD, of course, the e-mail addresses of the users must be stored in their profile. To check this, switch back to the Active Directory Users and Computers program and call up a user’s properties. An entry should now appear there in the attribute list at mail.
11. domain name
You can also find out the name of your domain using the Active Directory Users and Computers program. In the screenshot below you can see where you can read the name. In our example, this would be avanet.local.
12. search queries
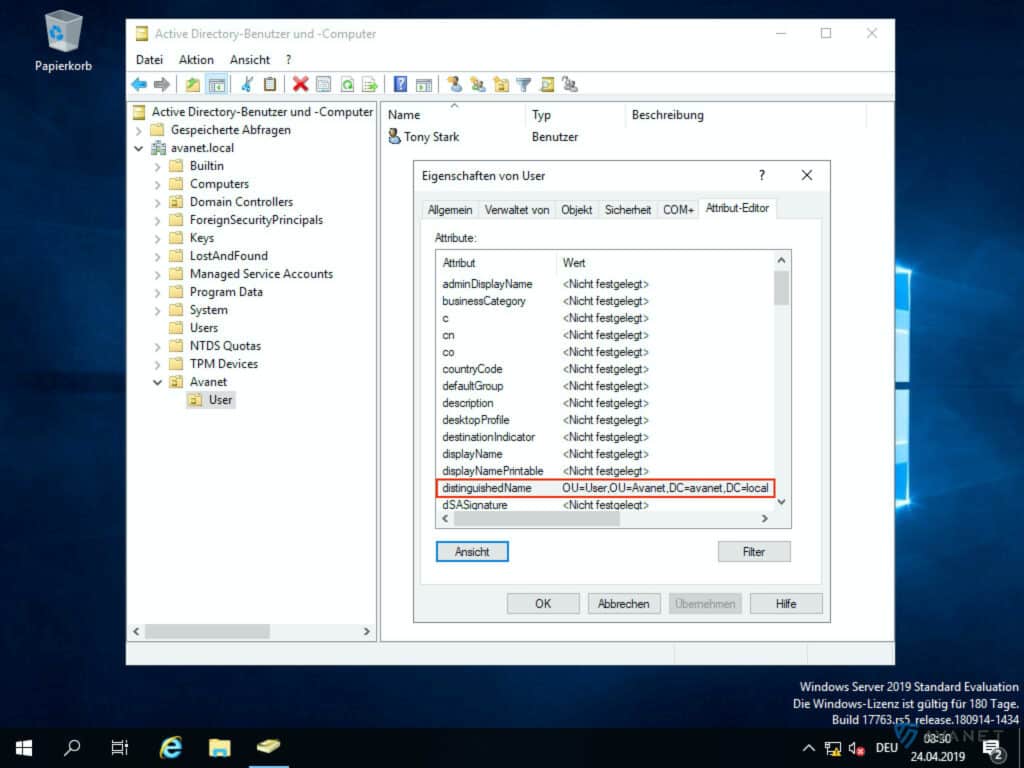
In this field you specify the path to the OU where the users and groups are located. If you want to search the whole structure, you can enter: DC=avanet,DC=local. In our example, if you want to specify only the users in the “Avanet > User” OU, the entry would look like this: OU=User,OU=Avanet,DC=avanet,DC=local
You can also look up the composition of this path yourself on the Active Directory. To do this, open the Active Directory Users and Computers program again and access the properties of your Organizational Unit (OU). After that, search in the attributes for distinguishedName. In the following screenshot you can see how we did it in the “User” OU.
Test connection
To test the configuration you have created with the last 12 steps, click on the button Verbindung testen. If the above values are filled in correctly in your form and Sophos Firewall can reach the AD, the following message should appear after a few seconds:

