Sophos Firewall DHCP Options (SFOS)
In this article, we will show you how to configure DHCP options on a Sophos firewall with the SFOS operating system.
Update – March 24, 2022
Since SFOS v18.5 MR3 there are now DHCP options in the GUI. This makes configuration a lot faster and easier.

Requirements
- Sophos Appliance with SFOS
1. create DHCP server
In order to be able to give DHCP options, you first need a DHCP server, of course. This can be created via the admin interface. Sophos has already explained how to do this in its own knowledge base article:
- Sophos Firewall: How to configure the firewall as a DHCP server – https://community.sophos.com/kb/en-us/123133
Important: The DHCP name should not contain spaces or special characters. Use e.g. CamelCase or separate with hyphen (-) or underscore (_).
2. connect to the console
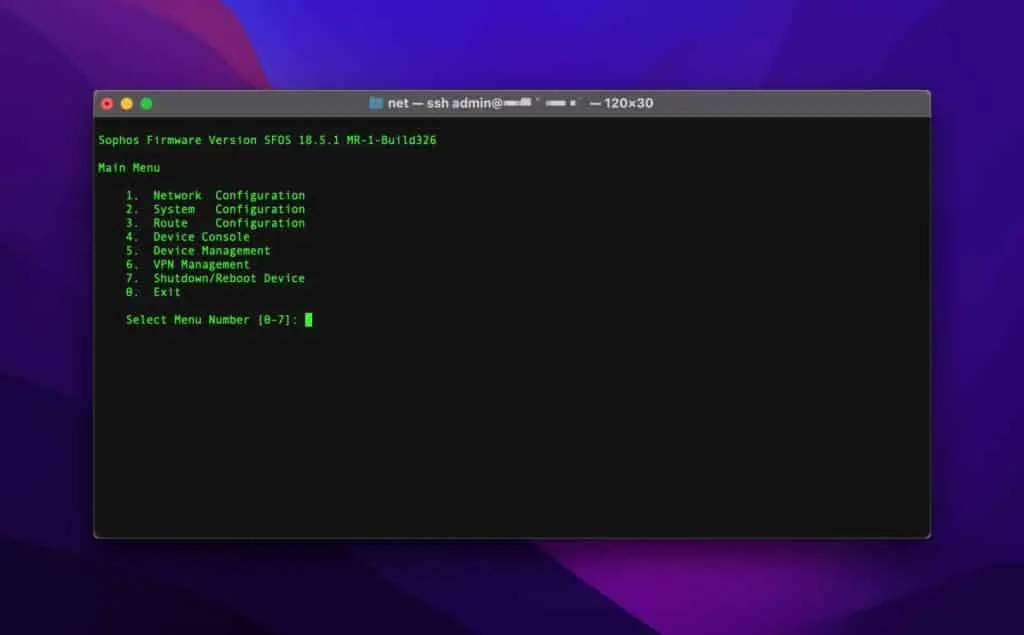
The DHCP options are not found in the WebAdmin GUI. You have to connect to the appliance via SSH to set it. On Windows there is the tool Putty and on macOS the already preinstalled terminal can be used.
- Open the macOS terminal and type
ssh admin@192.168.1.1into the console. When using Putty, only the IP address needs to be entered. The IP address can of course be different for your firewall. After that, you still need to enter your username and password to log in to your firewall via SSH. - After you are connected, select 4. device console to get to the shell.

Configure DHCP Option Objects
Sophos has written its own knowledge base article for this, but from our point of view it is not that easy to understand. What we find very useful about this article, however, is the additional information about the DHCP options. That’s why we’re linking to Sophos’s KB post here as a supplement, so you can find the full table with all the options: https://community.sophos.com/kb/en-us/123529
Example 1 – Part 1
For example, do you have the problem that with a Sophos RED 15w at an outdoor location, the integrated access point is not detected? Let’s take this case as an example and play through how you can create a DHCP option for it.
Define DHCP option
Before you can fill the option with data, you must first define an option. The command looks like this:
system dhcp dhcp-options add optioncode <Nr> optionname <SAMPLE-NAME> optiontype <TYPE>- Nr: Here you define the option code. There are a total of 255 such option codes. In Sophos KB post 123529 you can find the command to print all option codes in the terminal.
- SAMPLE-NAME: Here you can enter a name that makes sense to you and describes the option in the most understandable way.
- TYPE: Here you define the type that will be needed later for your option. The following types are available: array-of, boolean, four-byte, ipaddress, one-byte, string, two-byte
Important: In my examples, remove the < and >.
The working command for our example now looks like this:
system dhcp dhcp-options add optioncode 234 optionname dhcp_magic_ip optiontype ipaddressExample 1 – Part 2
Now that the option has been defined, we still give the data with. The command looks like this:
system dhcp dhcp-options binding add dhcpname <DHCP-NAME> optionname <SAMPLE-NAME>(234) value <WERT>- DHCP-NAME: Here you enter the name of the DHCP server which you have created via the GUI.
- SAMPLE-NAME: Enter the same name as before. The spelling must match exactly.
- VALUE: An IP address is expected as a value here. For our RED example, this would be the IP address of the RED 15w at the outdoor location.
The working command for our example now looks like this:
system dhcp dhcp-options binding add dhcpname dhcp_red_avanet optionname dhcp_magic_ip(234) value 10.10.10.12Another example
Now that we have explained which two commands need to be issued, we will show you a few examples to make it easier to create your own Sophos Firewall DHCP Options.
With this option you tell a ThinClient on which server the image is located.
system dhcp dhcp-options add optioncode 161 optionname ThinClientServer optiontype ipaddress
system dhcp dhcp-options binding add dhcpname DHCP_Server_Avanet_LAN optionname ThinClientServer(161) value '10.10.10.12'
This command now specifies the port at which the ThinClient can report to the server. Here the optiontype is not ipaddress but string. In the best case, the manufacturer of the device will provide you with this information.
system dhcp dhcp-options add optioncode 192 optionname ThinClientServerPort optiontype string
system dhcp dhcp-options binding add dhcpname DHCP_Server_Avanet_LAN optionname ThinClientServerPort(192) value '443'
Example from Robert: WDS / PXE
The DHCP options can drive you crazy and you can spend hours searching for the right commands. Colleague Robert shares his experience with us here (thank you).
Part 1: One defines what exactly is to be configured:
A DHCP option value (IP) should be applied in the internal DHCP scope “Home_Scope” which I configured in the GUI. The WDS server listens with me on the IP: 172.16.16.11
system dhcp dhcp-options binding add dhcpname Home_Scope optionname TFTP_Server_Name(66) value 172.16.16.11Part 2: You define where a client can find the pre-enviroment:
system dhcp dhcp-options binding add dhcpname Home_Scope optionname Bootfile_Name(67) value \boot\x64\wdsnbp.comBy pre-environment is meant a boot file containing a standard VGA driver, network card drivers, and mouse and keyboard drivers. The Pre-Environment is the window you work with during Windows setup.
Delete the option
You may also want to delete such an option again, in which case the command would be as follows:
system dhcp dhcp-options delete optionname dhcp_magic_ip(234)Show DHCP options
This command will give you a list of all DHCP options already defined on the Sophos firewall.
system dhcp dhcp-options listShow DHCP options bindings
system dhcp dhcp-options binding show dhcpname <DHCP-NAME>- DHCP-NAME: This is the name of the option you have defined yourself.
The working command for our example now looks like this:
system dhcp dhcp-options binding show dhcpname DHCP_Server_Avanet_LAN