Sophos SSL VPN client in autostart with auto login
In this article, we will show you how to set the Sophos SSL VPN client to start right after Windows login and connect automatically.
Info: For this tutorial, we assume that you already have the Sophos SSL VPN client installed on your Windows system. Otherwise, the following two instructions may help you:
1. remove SSL VPN Client for Windows from autostart
When you install the SSL VPN client, a shortcut is automatically placed in the autostart. However, we will now create our own shortcut in the course of this tutorial and we can deactivate the existing shortcut first.

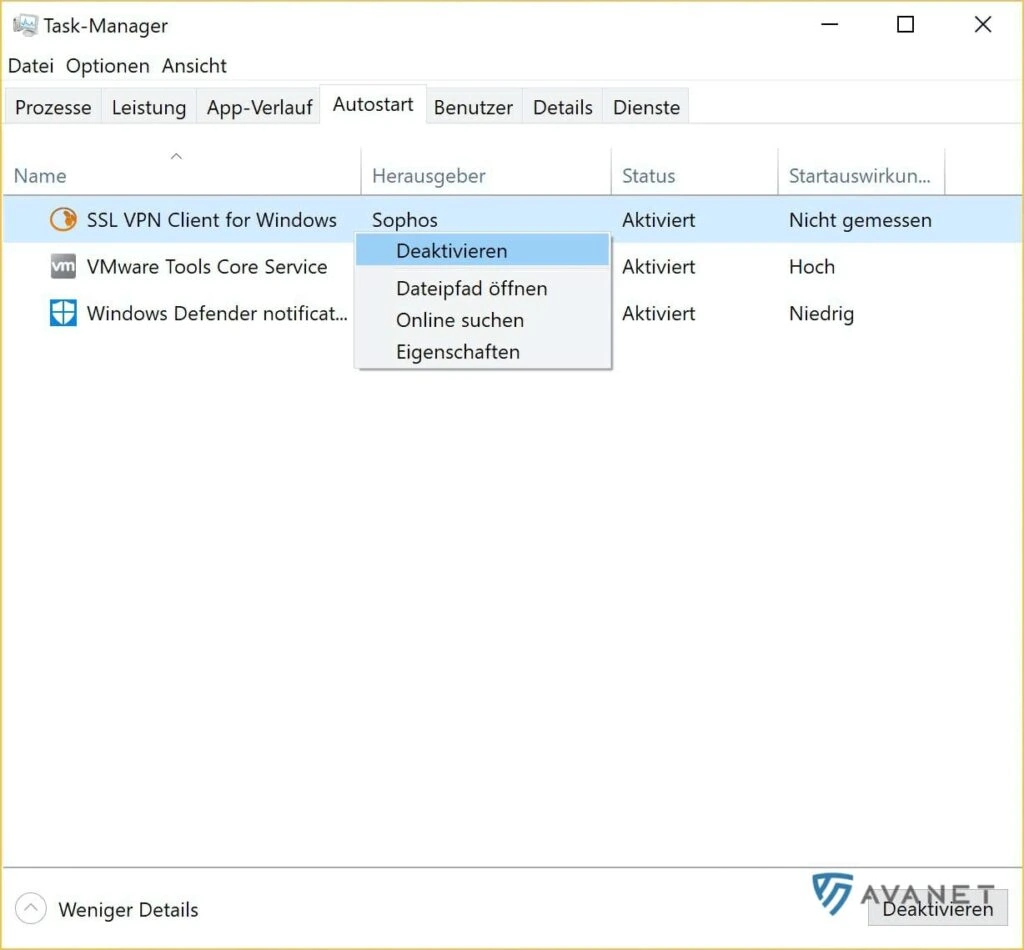
- Open the task manager and switch to the tab
Autostart. - Locate the SSL VPN Client for Windows shortcut and right-click to disable it.
Note: In Windows 10, you can find the settings for Autostart in the Task Manager. With older Windows versions there is an autostart folder.
2. compose paths with parameters
For our own shortcut in the autostart, which we will create later in the registry, we first compose a command line with a few parameters. The command line is structured as follows:
"[Pfad-zu-openvpn-gui.exe" --config_dir "[Pfad-zur-Open-VPN-config-Datei]" --connect [Name-der-Open-VPN-config-Datei].ovpn
So to build this command line you need two paths and the name of your Open VPN Config file:
- Path to openvpn-gui-exe
- For 32 bit Windows – “C:\Program Files\Sophos\Sophos SSL VPN Client\bin\openvpn-gui.exe”.
- For 64 bit Windows – “C:\Program Files (x86)\Sophos SSL VPN Client\bin\openvpn-gui.exe”.
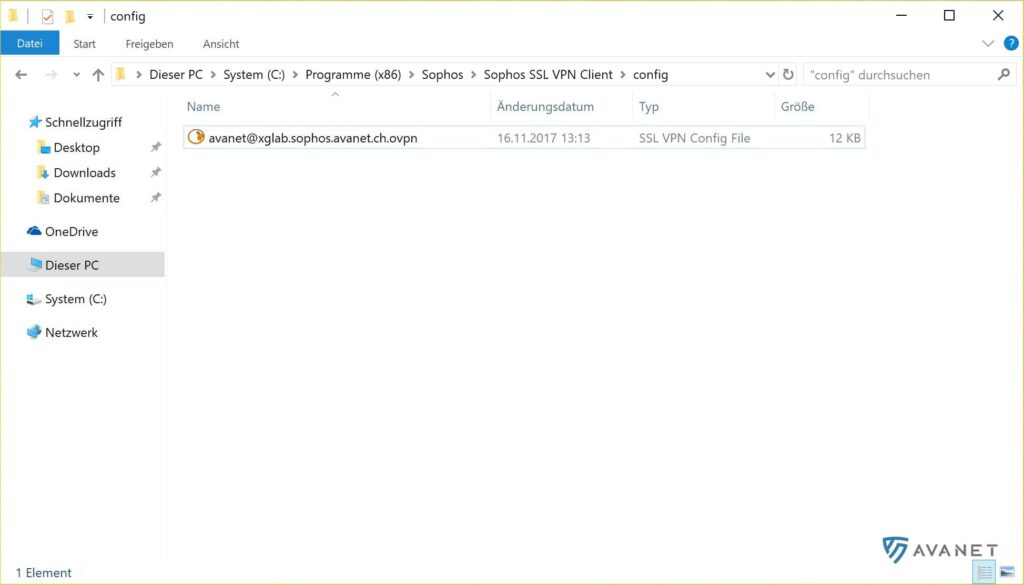
- Path to the Open VPN config file
- For 32 bit Windows – “C:\Program Files\Sophos\Sophos SSL VPN Client\config”.
- For 64 bit Windows – “C:\Program Files (x86)\Sophos SSL VPN Client\config”.
- Name of your Open VPN config file

In our example, our whole command line then looks like this:
"C:\Program Files (x86)\Sophos\Sophos SSL VPN Client\bin\openvpn-gui.exe" --config_dir "C:\Program Files (x86)\Sophos\Sophos SSL VPN Client\config\" --connect avanet@xglab.avanet.com.ovpn
3. create autostart
Once you have assembled your own command line, you can now define a new autostart entry in the registry.

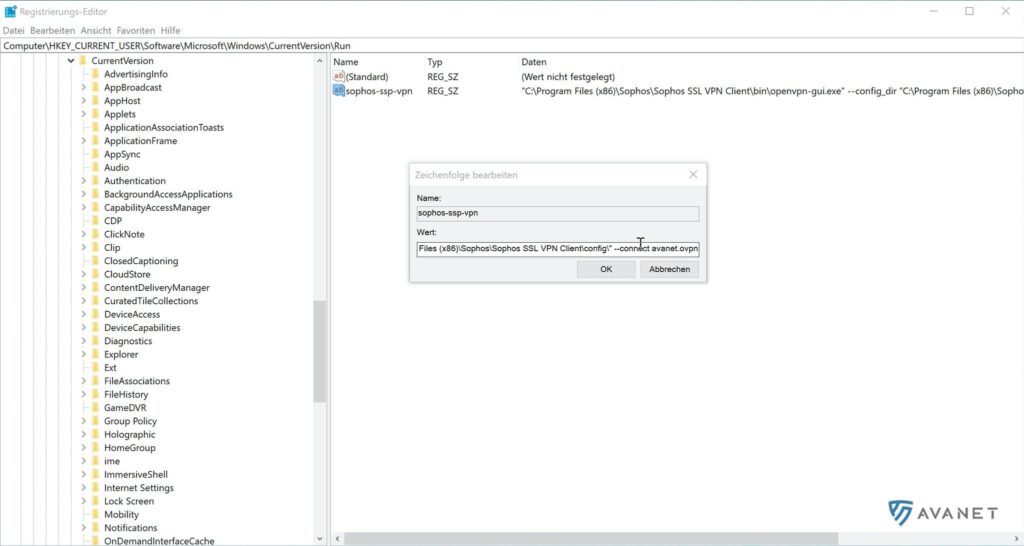
- Open the registry editor and go to the following path:
HKEY_CURRENT_USER\Software\Microsoft\Windows\CurrentVersion\Run. - Right-click in the right column and select
Neu>Zeichenfolge. - Give the new entry a name (for example, sophos-ssl-vpn).
- Then open the file with a double click and paste your compound command line into the “Value” field.
- Click
OKand close the registry editor.
5. login without entering password
To avoid having to enter the VPN password every time you restart your computer, you still need to perform the following steps:
- Start the text editor as administrator and then open the file “OpenVPNconfigFile“.
- Search the file for the line “auth-user-pass” and change it to “auth-user-pass password.txt“.
- Save your changes and create a new text file named “password.txt” in the same folder where the OpenVPNconfigFile file is located.
- Open the file “password.txt” and insert only your username and password. Note that you have to write each specification on a separate line. This then looks like this, for example:
supportuser A12v12+$1%4S - Save “password.txt” and restart your computer.
Important: Make sure that the “password.txt” file is really in the same folder as your Open VPN config file. In addition, with this variant your password is stored in plain text. If you are not completely comfortable with this, then you will have to give up the convenience of automatic login.