Assign Sophos Central licenses to users
In this article, we will show you how to assign a user automatically created by Sophos Central to an existing login, so that the licenses are counted correctly.
Requirements
- Sophos Central Account
- User login with an Admin or Super Admin role
- You understand how the Sophos Central licensing model works
Initial situation
In Sophos Central, you have the option to distribute either personalized or global setup files. If a user installs a global setup file on his computer, Sophos Central logically cannot associate this user, thus generating a user itself. The user created automatically by Sophos Central is given a name that is structured as follows: Hostname\user (Hostname: computer name / User: user name of the logged-in user).
Note: If there is no user yet that you could link to the automatically created user, you can simply rename it. To learn how to do this, see the article “Renaming Sophos Central users”.
1. log in to the Sophos Central account
Log in to
https://central.sophos.com
to log in to Sophos Central Admin.
2. show all users
Click on the menu item People in the sidebar. Now all users are listed, which you yourself or the system has created so far. Search for the user that Sophos Central automatically created and remember the generated name.
3. edit user
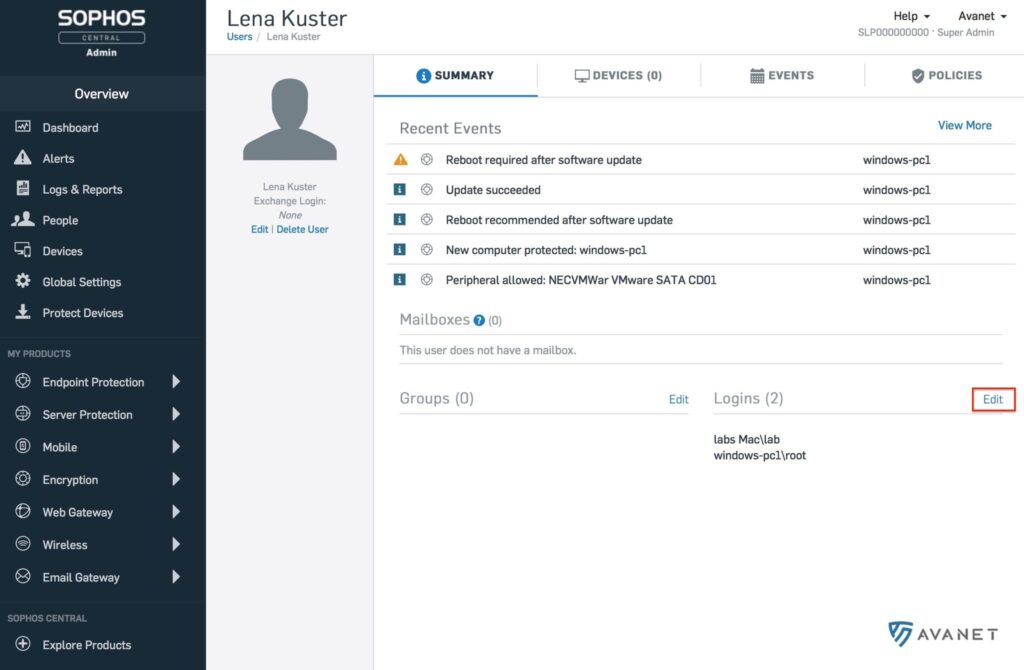
Once you have remembered the name, now find the existing user you want to assign this login to. Click on the Namen des Benutzers to access its profile view. Then click at the bottom right at Logins on Edit

4. assign login
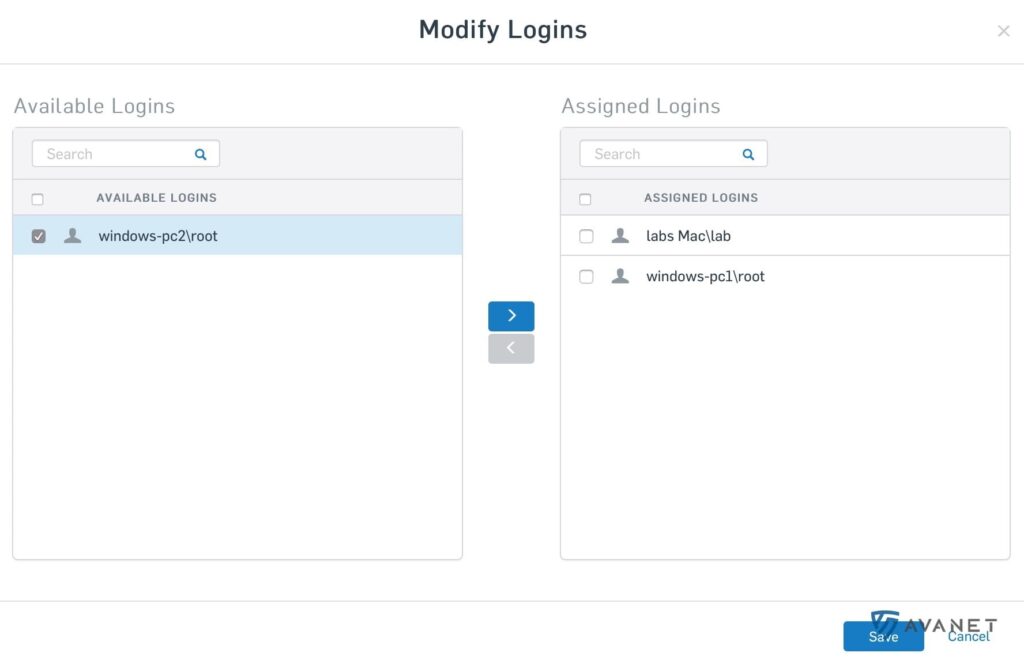
In the form that appears, search in the left column for the generated name that you remembered. Select this name and click the button with the >. Now you can apply the changes by clicking on Save and finally delete the generated user.

Important: If you do not delete the user generated by Sophos Central after it has been assigned, it will still be counted as a user and a license will be counted accordingly.